Stamp your logo everywhere! Using the new Flux In-Context LoRA collection, you can embed images into others seamlessly. Let me teach you with a basic example (with an open-source ComfyUI workflow).
First, you would want to download the workflow and all of the different models. I’ve created a GitHub repository that contains the workflow https://github.com/hugovntr/flux-in-context-workflows. As for the models, you can find all things Flux related on HuggingFace, and for the LoRA: https://github.com/ali-vilab/In-Context-LoRA.
Once you have setup everything, installed all the nodes, etc. You are ready to start.
Guide how to add logo
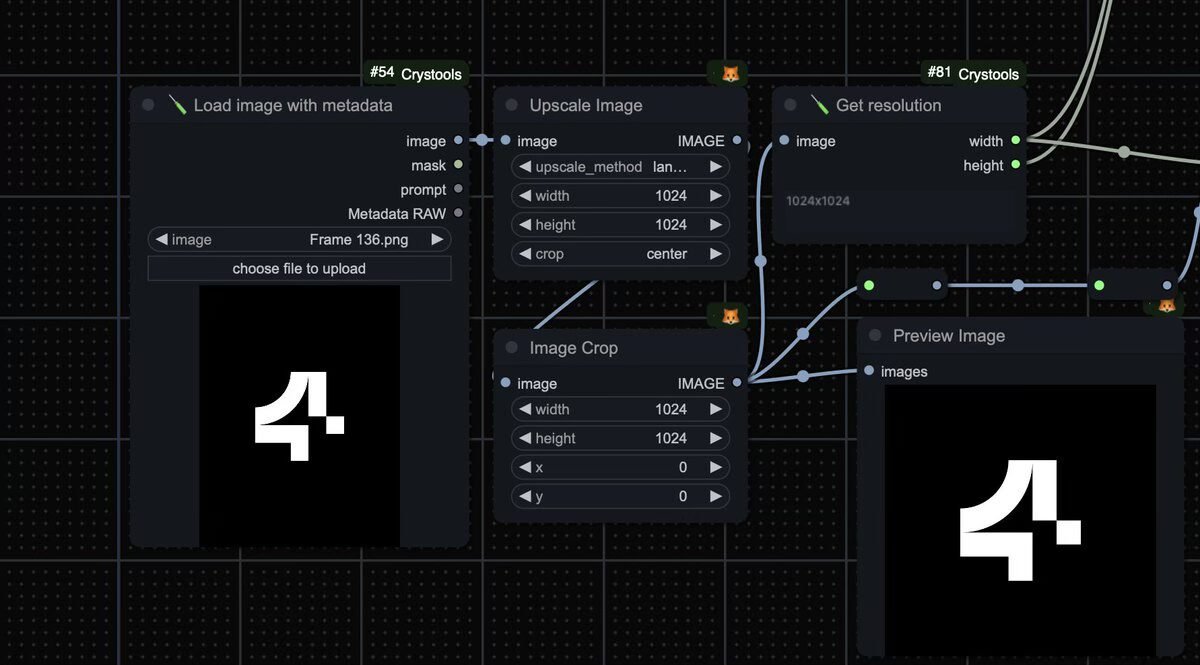
First let’s add our logo as an input image. Black and white (or anything with a plain background) works best. The logo will then be “upscaled” to 1024×1024, but you can modify the two node (as shown in the figure below) to make it perfectly fit inside of the input image.

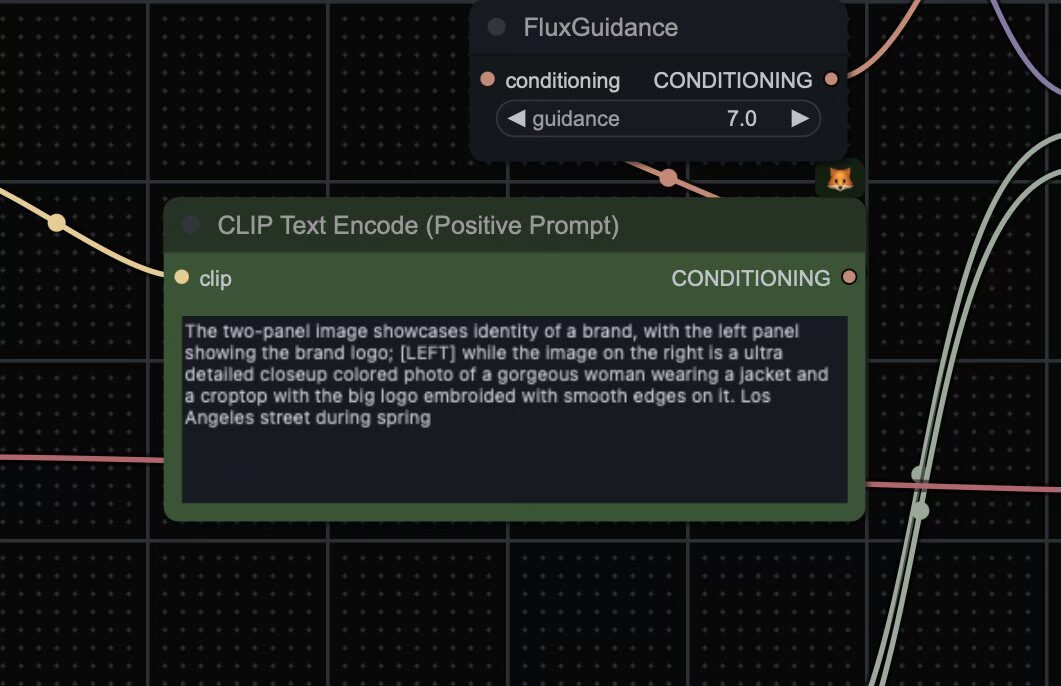
Next, prompting. Here, again, it’s pretty straightforward. First you start by describing your logo, then you add a separator ([LEFT] seems to be working fine). And finally you describe the image where you want to see your logo.

You will now have a great image that contains your logo! Congratulations!
Author: @hugovntr
Read other article in our Blog:
